Here is our guide to using the iPhone version of PlanBuyCook. Click here to go to the iPad tutorial.
Adding your own recipes to your PlanBuyCook iPhone app.
You navigate through the app using the PLAN, BUY and COOK buttons on the bottom of your iPhone screen.
SETTING UP YOUR APP
When the app loads it will first ask you to access your Calendar. Select YES, as this is the mechanism that saves your meal plan and reminds you of which meals you have selected daily. You can also choose to allow notifications, which include a notification when any of the timers are due to sound.
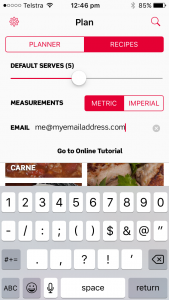
Set up your app, including the default size of your household (1–10 serves), using the SETTINGS at the top left hand side of the app in the PLAN section. Choose METRIC or IMPERIAL measurements and naming. Choosing IMPERIAL will switch the naming from Australian/English ingredient names to US names automatically. You can nominate an email address to send your shopping list to, if you are not the person doing the shopping. Tap on the SETTINGS icon to save and exit SETTINGS.
PLANNING MEALS
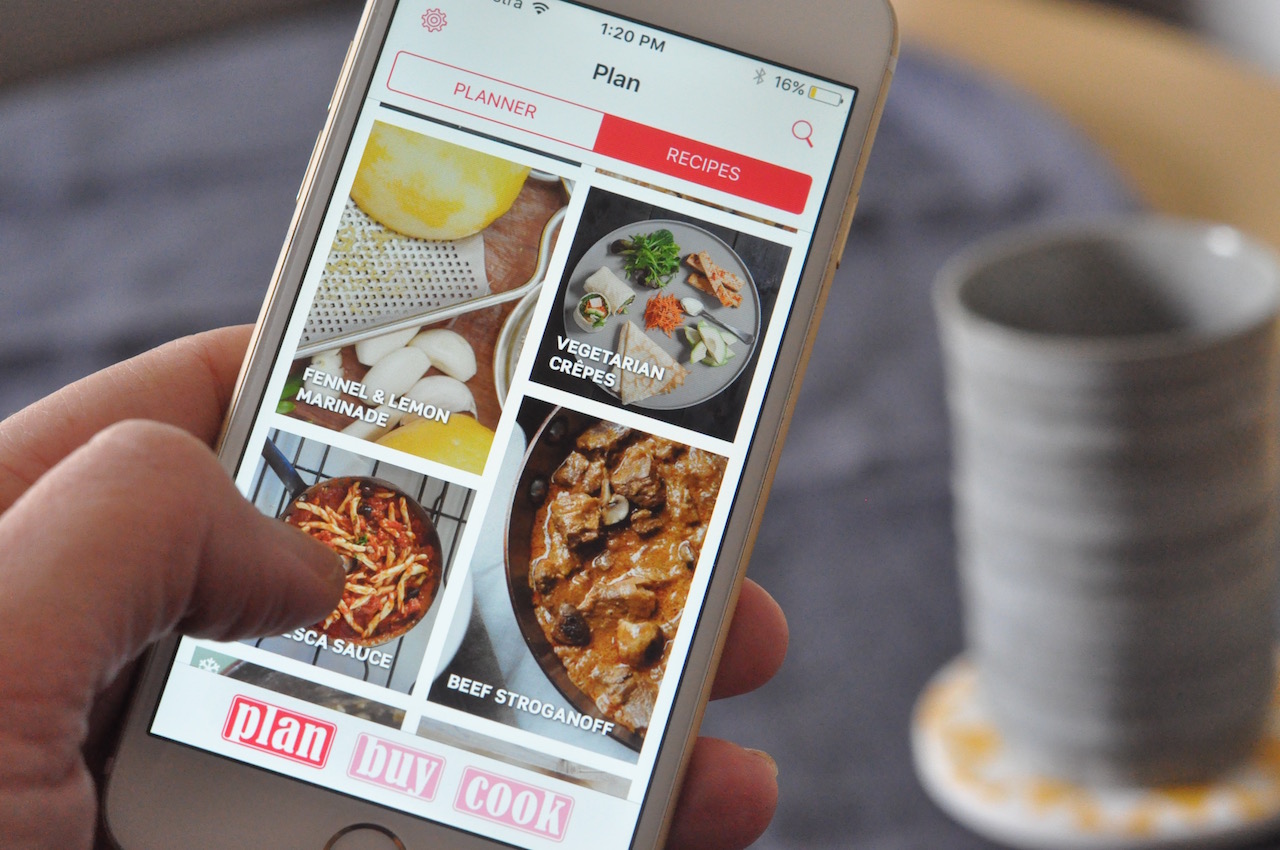
When your app opens, it will take you to the RECIPES tab or the PLAN section.
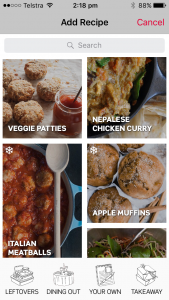
Here you can browse all the PlanBuyCook recipes available. There are more than 120 recipes, including breakfasting meal recipes, as well as snacks and cakes. Recipes that are freezable show with a snowflake icon on the top left hand side.
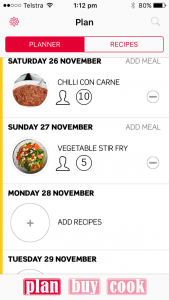
To plan your meals, tap on the PLANNER tab in the PLAN section.
To add a meal, simply go to the date you are planning for, then tap on the circle to ADD RECIPES. It will automatically switch you to the RECIPES tab, where you can choose either a PlanBuyCook provided recipe, or you can select from the LEFTOVERS, DINING OUT, WRITE YOUR OWN, or TAKEAWAY illustrations at the bottom of the screen.
If you choose a meal from the PlanBuyCook recipes, it will automatically set the serves for that selected meal in your PLANNER to the default household size you have selected in your SETTINGS. If you wish to increase the serves, simply tap on the number up to the number of serves you wish to make that meal at – e.g. if it is freezable, you may wish to double the amount you are cooking and freeze half of the meal. The number will continue to go up each time you tap on it up to 10, then start again at 1. If you make a mistake, continue tapping until you get to the right number of serves.
If you choose to add any of the illustrations at the bottom of the RECIPES screen into your planner, you can change the wording e.g. Takeaway can become Indian takeaway. If using FREEZER/LEFTOVERS, write which meal you plan to use from your freezer to ensure you get the meal you had planned that night.
Tapping on the RECIPE image in either the PLANNER or RECIPE tab will take you straight to the COOK page for that particular recipe. If you tap from the PLANNER page, it will display the ingredient quantities by the number of serves you have selected for that meal.
All selections you make in your PLANNER will be added into the calendar of your iPhone. You can choose to be notified daily of your selections at a particular time (default 9am) as well as share your PlanBuyCook calendar with family members. No more “What’s for dinner?” – they can know without asking.
ADDING A RECIPE TO YOUR DATABASE
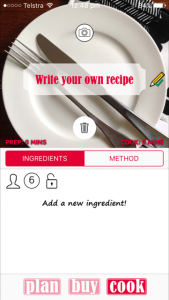
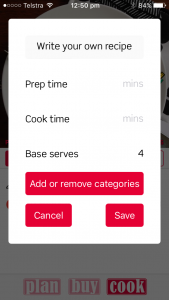
Adding recipes in your PlanBuyCook app is easy. From the PLANNER tab in your PLAN section, go to a date and select ADD RECIPE which will switch you to the RECIPES tab. Choose the illustration at the bottom of the screen to write your own. Fill in the RECIPE NAME, then it will take you to the COOK page with a blank template for that recipe. Tap on the pencil icon to the right of the recipe name to edit the recipe.
You can edit the PREP and COOK times, and BASE SERVES (you may have a family of 5, but your base recipe will be for 4) by tapping on the recipe name. Choose the amount your recipe is written for originally here (base serves). The app will automatically scale it to your default household size when you plan the meal. You can also choose CATEGORIES here using the Add or remove categories button. Choose as many categories as you like to then click the BACK TO RECIPE button. Save that data to exit the screen.
Once in the main screen, you will see a lock. Click on this if you wish to LOCK SERVES (i.e. you don’t want the app to scale the recipe). This is particularly useful with desserts where you do not want to amend the recipe in any way. If you wish the meal to be scaled, leave the lock open/unlocked.
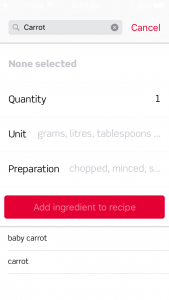
You can add ingredients under the INGREDIENTS tab. Tap on the Add a new ingredient. This will take you to a screen to search ingredients to add. Search each ingredient in the singular (e.g. carrot rather than carrots). At the lower part of the screen it will display all matching ingredients to your search (e.g. carrot and baby carrot). Select the matching ingredient (carrot), then choose the QUANTITY (e.g. 2 or 200), the UNIT (for ingredients such as carrot/egg etc., choose ‘number’. Otherwise is it is measured in ml or grams or ounces etc, choose the matching unit). You can also nominate PREPARATION here – e.g. finely chopped. Hence adding 2 carrots, finely chopped would involve searching for carrot and choosing it in the lower part of the screen, selecting 2 in quantity, ‘number’ in unit, and writing finely chopped in preparation. Then tap the button ‘Add ingredient to recipe’ to return to the ingredients tab for your recipe.
Continue to do this for each ingredient until you have added all ingredients. It is really fast once you know what you are doing.
To add each method step, simply tap on the ‘Add a new recipe step’ text under the METHOD tab in your COOK section. Type the recipe step at the top (where it says ‘Write step here’). You can add a timer to any step by adding a number in minutes. A timer will then appear in that step set for the number of minutes you have nominated. You can use these while you are cooking if you wish. Tap SAVE to exit that step. Continue adding method steps until you have finished.
You can add an image to your recipe by tapping on the CAMERA icon above the RECIPE NAME. You can either take a photo of the recipe or use an existing photo fro your camera roll. HINT: use your camera to take a photo of the recipe in your cookbook, or use an image of a similar recipe from the internet. If you do not change the photo, the new recipe will simply appear with the empty plate image in your planner (which is fine too).
Once you have added all the ingredients, the method steps and a photo (if amending), tap the PENCIL icon on the right of the RECIPE name to save the data. The recipe will now appear in your RECIPES tab in the PLAN section. You can tap to it from either the PLANNER on the date you have nominated, or the RECIPES tab.
You can also share your recipe between devices or even to other PlanBuyCook app users. Simply tap the share icon on each recipe, and AirDrop to another user. The recipe should appear on their copy of the PlanBuyCook app.
GENERATING YOUR SHOPPING LIST
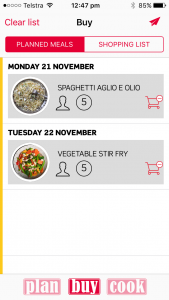
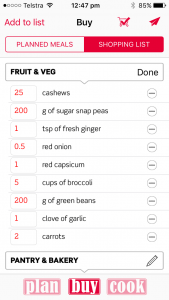
Your PlanBuyCook app makes generating your shopping list a breeze. To get a shopping list, simply select all the meals you wish to shop for by going to the BUY section and tapping on the PLANNED MEALS tab. You can see all your selected meals in date order. To add the ingredients of these meals to your shopping list, tap on the trolley icon to the right of the meal. It will grey out that meal to indicate you have added the ingredients to the shopping list. Tap on all the meals you wish to add to your shopping list for that particular time. It will automatically sort all ingredients into shopping categories.
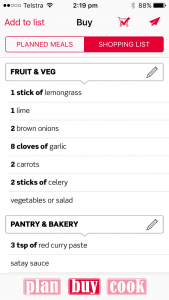
To view your list, tap on the SHOPPING LIST tab in the BUY section. Each of the ingredients for any meals you have selected here will display by shopping category e.g. pantry, fruit & veg etc. You can edit the amounts you wish to buy of any ingredient by tapping on the pencil icon in the header of each shopping section. You may have some and not require the full amount nominated, or you may choose to increase any ingredient as well. Tap DONE in the header to finalise any edits.
You can add additional items to your list by tapping on the Add to list text at the top left hand side of the SHOPPING LIST screen.
You can delete any items you do not need to buy by simply tapping on the item.
If you are doing the shopping yourself, simply ‘tap’ an item to remove it from the list. It will appear at the bottom of the section with a line through it.
If you are not doing the shopping, you can email the list to another person by tapping the paper plane icon on the top right hand side of the screen, and it will appear in their email (the list is interactive if the email recipient has an iPhone, otherwise it just appears as a regular list for Android or Windows users). If you have entered an email in SETTINGS, it will automatically enter that email address.
If you have done the shopping and wish to clear the list, tap on the trolley with the tick on the mid right hand side of the screen, and it will clear the list for you. A trolley will then appear on the meals you have shopped for in your PLANNER to show you have purchased the ingredients for that meal.
COOKING YOUR MEALS
To view each recipe for the number of serves you have planned the meal for, tap on the meal image in the PLANNER where it displays the meal at the amount you have planned it for. This will take you to the COOK section.
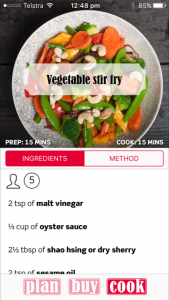
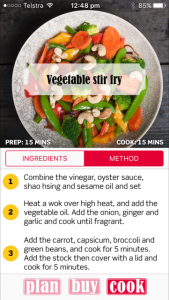
You can view the ingredients in the INGREDIENTS tab, and see the steps in the METHOD tab. It will also display the nutritional information for each meal (this is not provided for any snack recipes due to variable serving sizes), and tips for each meal.
You can tap on each recipe step in the METHOD tab to highlight it. To run a timer, simply tap on the timer in the selected step. This will start the timer. To stop the timer, simply tap again. to reset the timer back to the original time, tap and hold on the timer.
Your PlanBuyCook app makes planning for and cooking your meals a breeze.
