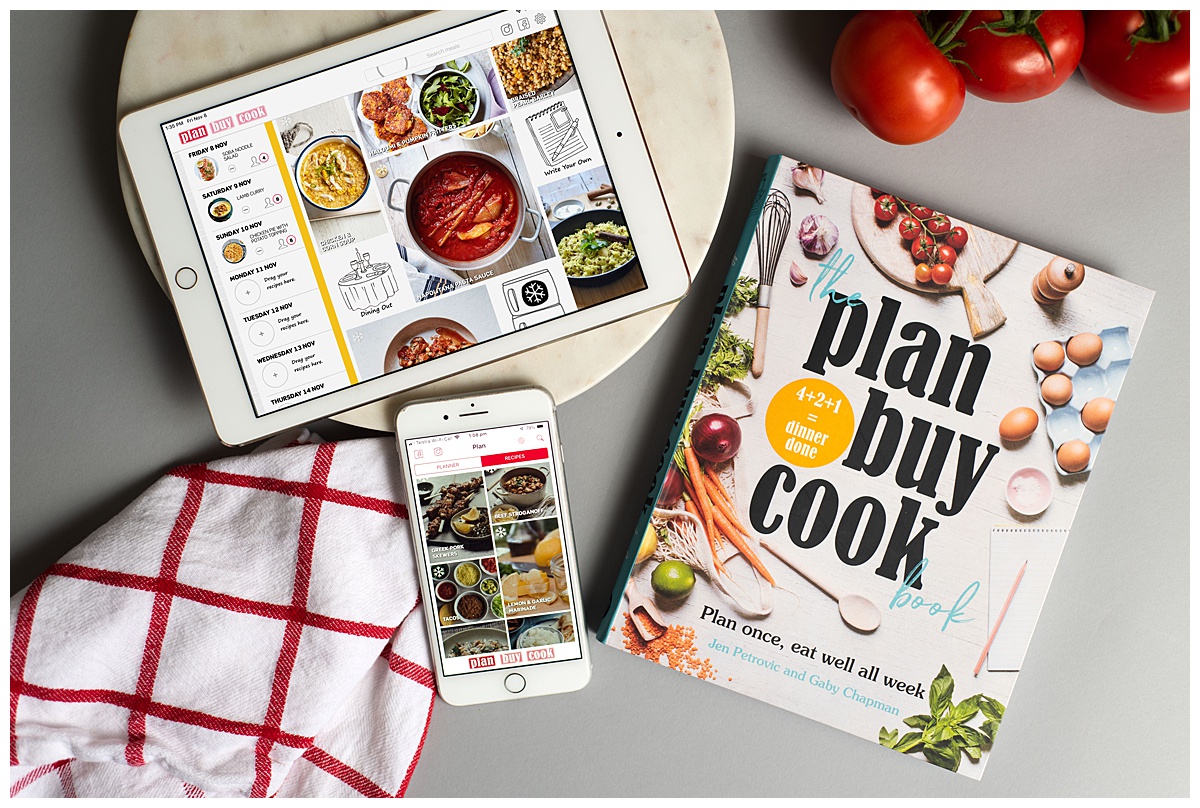
Here is how to make the most of your PlanBuyCook iPad app.
To view the iPhone app tutorial, click here.
- Start on the PLAN page and browse all the available meals and other options. Freezable meals are shown with a snowflake on the top left hand side of each picture.
- To view a particular recipe, tap on the picture in the meal ‘mosaic’ on the PLAN page. This will take you to the COOK page for that meal. To return to the PLAN page tap PLAN on the top of your screen.
- Use the SETTINGS to set your default serves for meals (i.e. your family size) and choose metric or imperial measurements. All recipes will then display according to your default settings.
- In SETTINGS add the email address for your smartphone to send your shopping list to.
- Click, drag and drop selected recipe onto the day you wish to plan for. Your meal choices will be automatically added to Calendar on your iPad.
- Easily write your own recipes by dragging the Write Your Own illustration onto the planner. Type in the recipe name, then tap on the recipe in either the planner or the meal mosaic to write the recipe.
- On the COOK page for your recipe, click on the pencil icon on the right hand side. Then set the number of serves (or lock the scaling), then add the ingredients, amounts and units, as well as any prep under the Ingredients side. You can then also type in (or copy and paste from a recipe website) the method by step. Fill in the timers in minutes the method to set them for any steps you require. You can also add any tips, and enter the recipe source and categories for your own recipes. Add an image by tapping on the camera icon in the top right hand side, and choose an image from your camera roll. You can save images from websites to your camera roll, photograph your own meal or photograph a picture in a recipe book or magazine.
- Scale any recipes according to the number of people you are cooking for on a particular night, or double them if you want to freeze extra meals for another time. Do this by pressing on the profile with the number of serves in a circle and move to the left to scale down or to the right to scale up.
- Plan for when you are eating out, using a freezer meal, using your own recipe or ordering takeaway by clicking on, dragging and dropping the illustration to a particular day. You can edit the text on any of these special meals to say Pizza on your takeaway day, Leftover bolognese on your Freezer/Leftover day of Grandma’s house for Dining Out.
- You can share the PlanBuyCook calendar with your household members. Go into Calendar on your iPad, tap on Calendars on the bottom of the screen and choose the PlanBuyCook calendar. Click through to SHARE the calendar with your family or housemates.
- Once you’ve completed your PLAN, head to the BUY page to select the meals you wish to add to your shopping list. Check that you are cooking for the correct number of people on the given night. If you need to make changes to the number of serves, return to the planner to change the scale on a particular recipe.
- Click on each meal you wish to shop for now, which adds the ingredients scaled to the meal size you have selected. Each meal that has been added to the shopping list will be highlighted in green.
- Add extra items to your list by using the Search items to add function. Type in the item name, select from the drop down list of similar items then highlight it. Once selected, you can insert the number or amount of each item and the weight, then use the + button to add it to your list. The item should be automatically placed into the supermarket aisle or specialty shop where it belongs.
- If you type in an item that is not on the shopping list, it will show in red on the drop down menu. Select this item, insert the amount and weight if required and then the + button. All items that are not recognised by the list will go to into the HOUSEHOLD aisle.
- Email the shopping list to your phone and cross off the items as you walk through the supermarket, or print from your email address if you’d prefer. Once you have emailed your list the meals you have purchased ingredients for will feature a shopping trolley icon with a tick on both the PLAN page and the BUY page to show you have purchased the items for this particular meal.
- To delete the list, click on the Shopping done clear list icon on the left hand side.
- When you are ready to cook a meal on a particular night, tap on the night’s meal in the meal planner which will take you to the COOK page correctly scaled for that night.
- You can mark any favourite meals by clicking on the star icon on the right hand side of all COOK pages. This will show as a star on the PLAN page in future.
- Use the A+ or A- to increase or decrease the font size.
- See any tips using the red TIP button near the picture.
- Use the timers for particular steps. T on the timer once to activate. The timer will go green. Click on the timer again to pause it if required. The timer will go red. Clicking again will then restart the timer from the time is was paused.
- To reset the timer, click and hold on the alarm icon.
- Double click on the timer to add 5 minutes.
- SHARE your own recipes with other PlanBuyCook users or to your own devices and social media using the SHARE icon. The full recipes should appear on other devices. You can also print or email recipes through the SHARE function.
- If you need to view the help on startup, go to SETTINGS and tap on the globe button to the right. It will then show when you next open the app.
- Go forth and PLAN, BUY, COOK.
Having trouble using your app? Try our troubleshooting and FAQ pages for more information, or email us at info@planbuycook.com.au.

